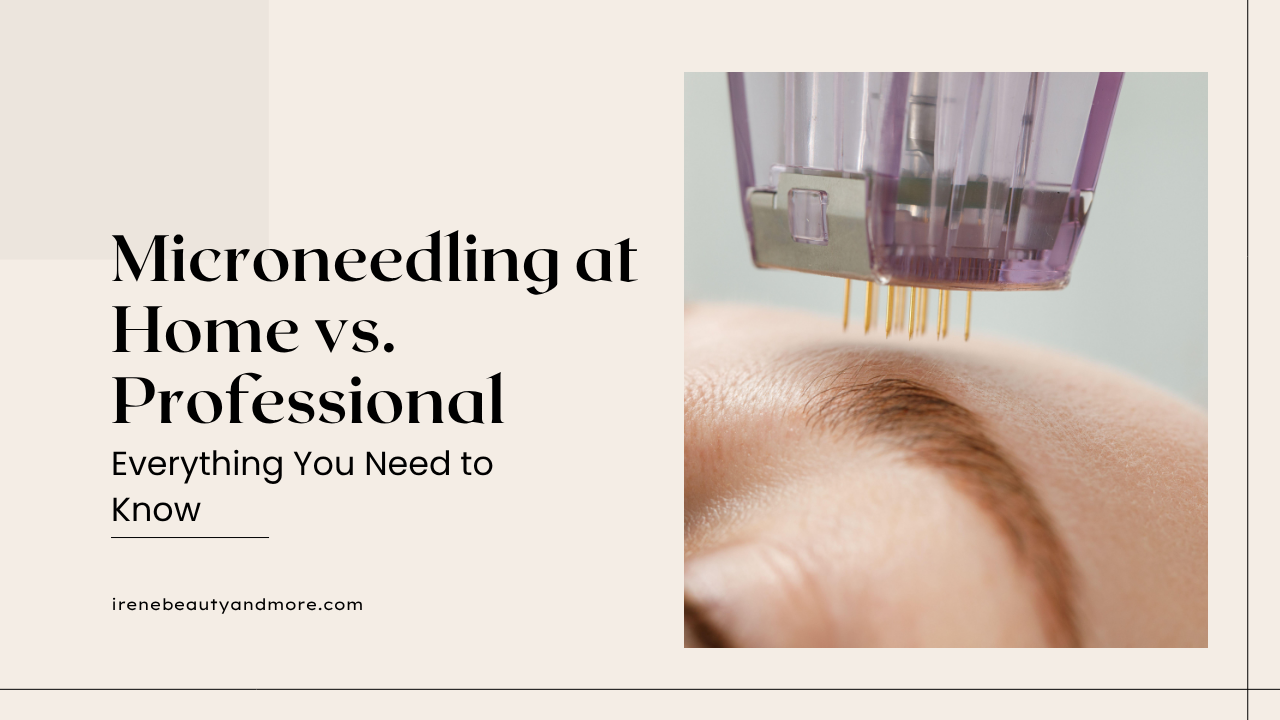
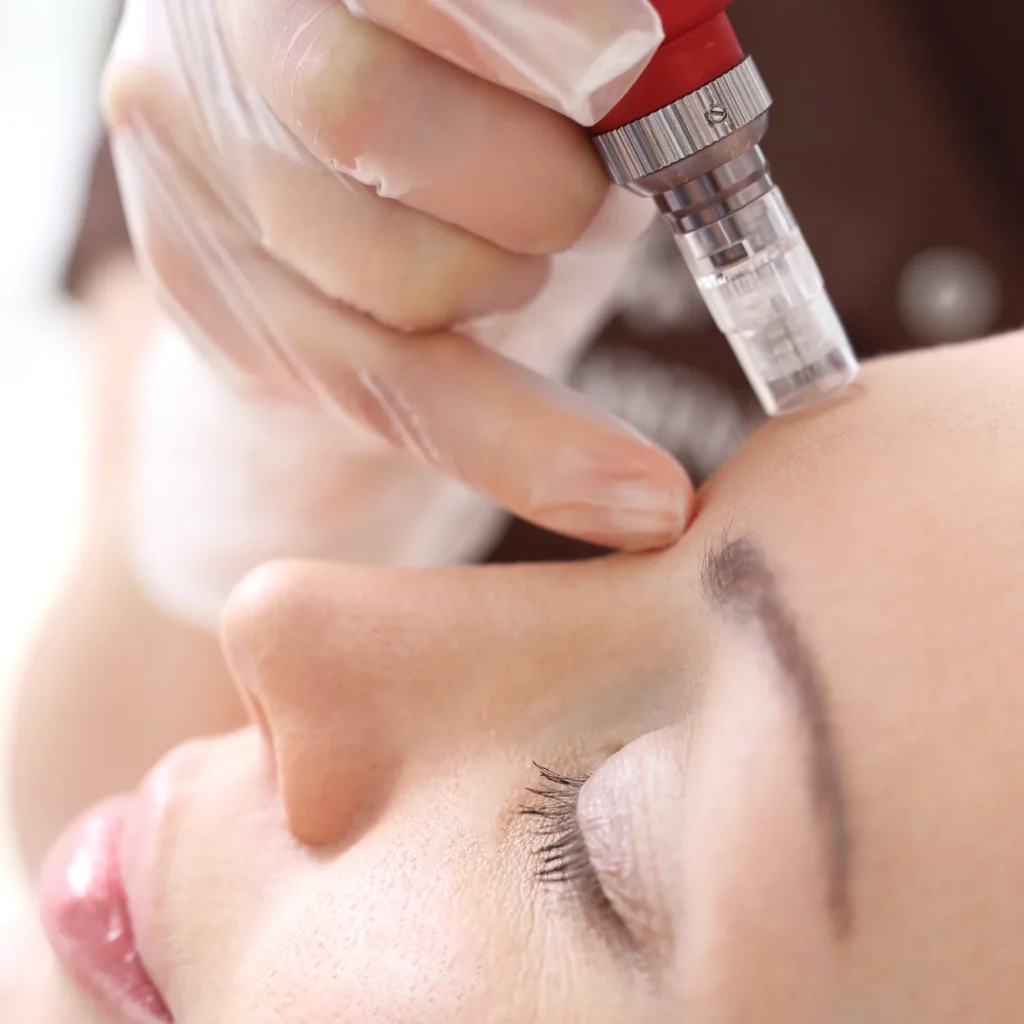
In the ever-evolving world of skincare, treatments that promise smoother, firmer, and more youthful-looking skin are always in demand. One of the most talked-about professional treatments today is microneedling, also known as collagen induction therapy. What was once only available at dermatologists’ offices and high-end skin clinics has now become more accessible, thanks to advanced at-home devices like the Dr Pen M8, which allow skincare enthusiasts to explore this treatment in the comfort of their own homes.
In this post, we’ll discuss everything you need to know about microneedling: what it is, how it works, its benefits, costs, what areas it can target, risks and side effects, how to prepare for it, what to expect during the procedure, and the recovery process. We’ll also compare professional microneedling with at-home devices like rollers and pens, and I’ll introduce the Dr. Pen M8 microneedling device, which I will personally be testing and sharing my experience with in the coming weeks.
What Is Microneedling?
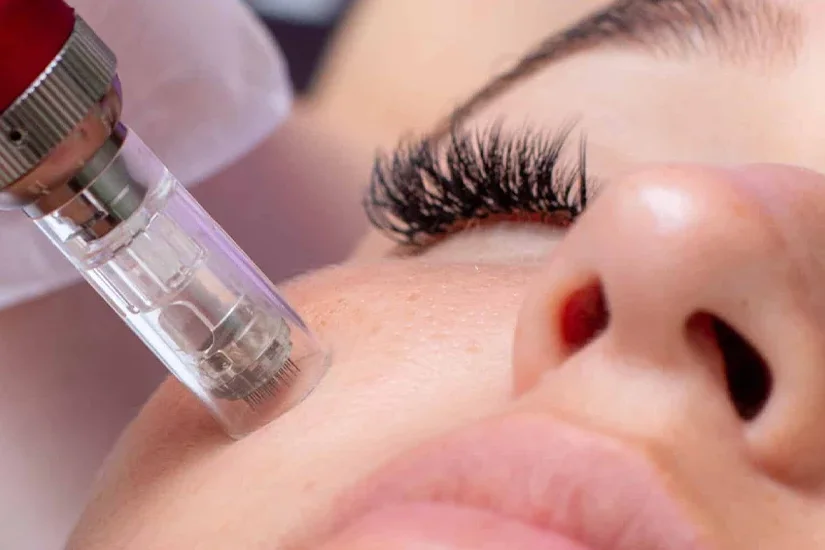
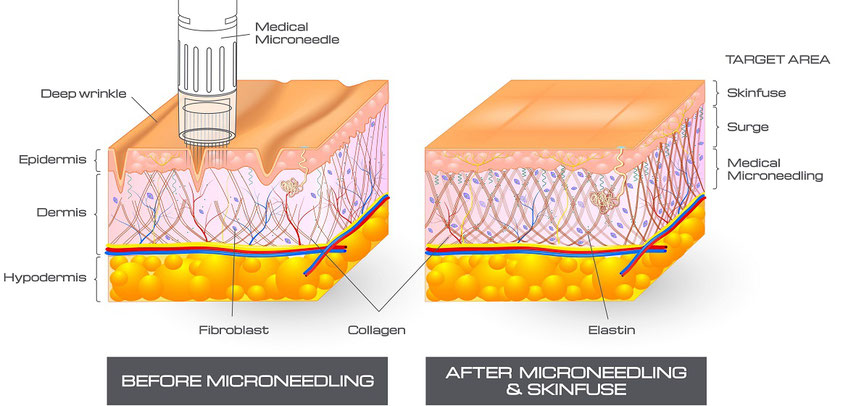
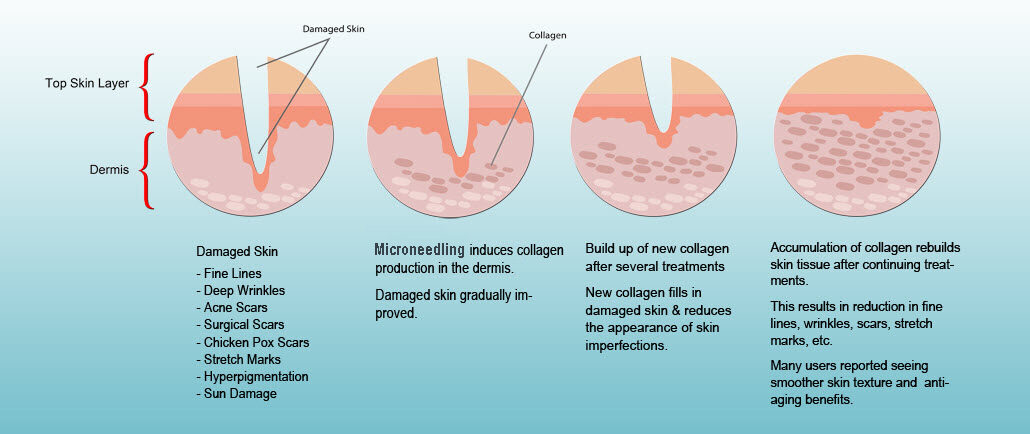
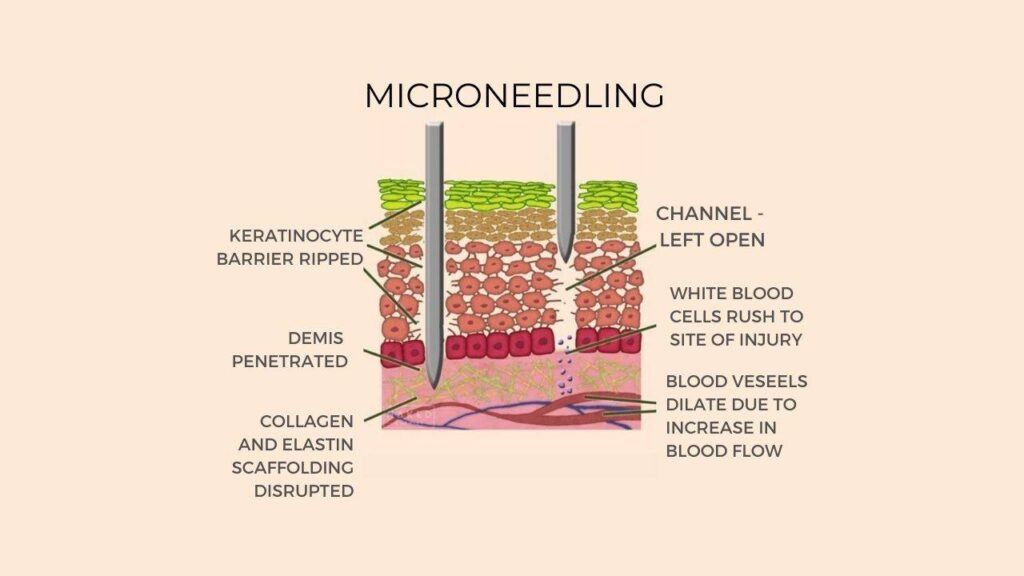
Microneedling is a minimally invasive cosmetic procedure that involves puncturing the skin with tiny, sterile needles. These controlled micro-injuries stimulate the skin’s wound-healing cascade, ultimately leading to increased production of collagen and elastin.
- Collagen provides structure, firmness, and resilience.
- Elastin gives skin its ability to stretch and bounce back.
With age, collagen and elastin decline, leading to wrinkles, sagging, and loss of volume. Microneedling essentially “reminds” the skin to regenerate, repairing not just age-related changes but also scarring and textural irregularities.
The procedure is versatile: it can be performed on the face, neck, scalp, and body, making it one of the most adaptable tools in aesthetic dermatology.
The Science of Collagen Induction Therapy
Microneedling relies on the body’s natural wound-healing process, which occurs in three phases:
1. Inflammation Phase (0 – 48 hours)
- Micro-injuries trigger platelets to release growth factors such as PDGF (platelet-derived growth factor) and TGF-β (transforming growth factor beta).
- These signals recruit immune cells, increase blood flow, and prepare the skin for repair.
2. Proliferation Phase (2 – 10 days)
- Fibroblasts migrate to the area and produce collagen type III (immature collagen) and elastin.
- New blood vessels form (angiogenesis), improving circulation and nutrient delivery to the skin.
3. Remodelling Phase (10 days – 6 months)
This process doesn’t just create superficial improvements—it fundamentally reorganises the skin’s architecture.
Here’s a simplified version of what happens under the surface:
- The microneedling device makes hundreds of tiny punctures.
- Your body says, “Wait, we need to fix this!” and sends growth factors to the area.
- New collagen and elastin fibres form.
- Over time, skin becomes smoother, firmer, and more even.
It’s controlled damage that leads to controlled renewal.
A Brief History of Microneedling
Although microneedling seems like a modern trend, its origins date back decades:
- 1995: Dr. Desmond Fernandes, a South African plastic surgeon, pioneered skin-needling for scar treatment.
- Early 2000s: Dermarollers became commercially available, popularising at-home use.
- 2010s: Electric microneedling pens (dermapens) were developed, allowing greater precision and depth control.
- Today: Microneedling has evolved further with technologies like radiofrequency-assisted microneedling and PRP (platelet-rich plasma) combinations.
What was once a niche clinical treatment is now one of the most widely used skin therapies worldwide.
Benefits of Microneedling
The popularity of microneedling comes from its wide range of benefits, which extend beyond anti-ageing:
- Reduces Fine Lines and Wrinkles: By boosting collagen, microneedling softens lines and smooths creases.
- Improves Acne Scars and Other Scarring: It can significantly reduce the appearance of atrophic acne scars and even surgical scars.
- Evens Out Skin Tone: Hyperpigmentation, sunspots, and melasma can improve over time with consistent treatments.
- Minimises Pores: Collagen production tightens the skin, reducing the visibility of enlarged pores.
- Enhances Product Absorption – The microchannels created by the needles allow serums and treatments to penetrate more deeply.
- Stimulates Hair Growth – When used on the scalp, microneedling can stimulate dormant hair follicles.
- Overall Skin Rejuvenation – Improves skin texture, plumpness, and radiance.
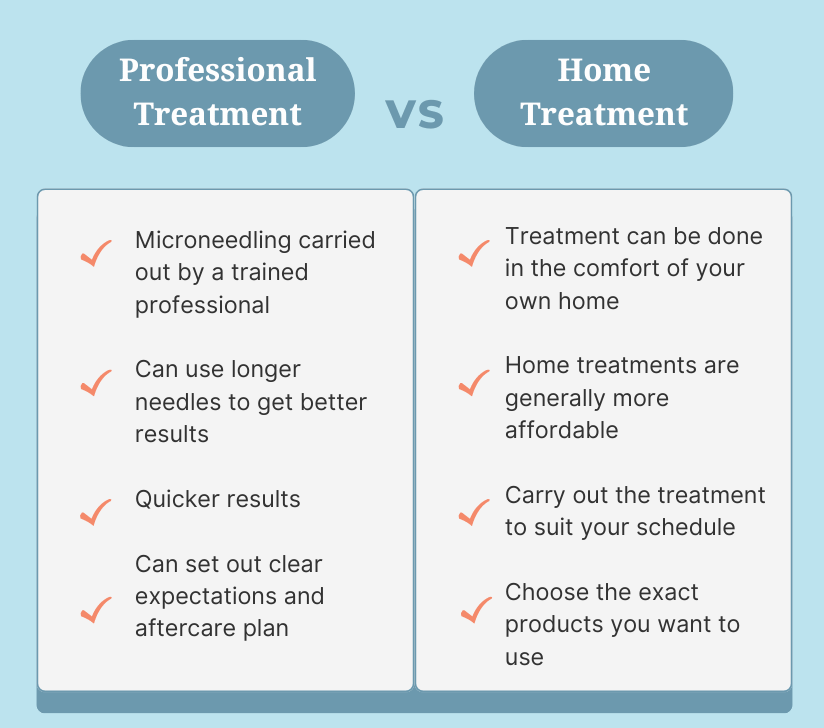
Professional vs At-Home Microneedling: Which One’s for You?
Microneedling started in dermatology offices, and professional treatments are still considered the gold standard. But at-home tools have opened the door for skincare enthusiasts who want more control over their routines.
Professional treatments:
- Performed by trained clinicians.
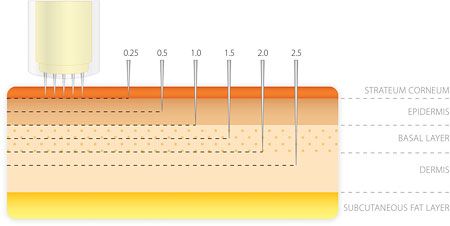
- Adjustable depth up to 2.5 mm.
- Cost: £150–£350 per session in the UK.
- Typically spaced 4–6 weeks apart.
- Ideal for deeper scars, wrinkles, and pigmentation.
At-home treatments:
- Affordable long-term.
- Devices like the Dr. Pen M8 allow adjustable depth.
- Safer if done with shallower settings (0.25–1 mm for beginners).
- Require strict hygiene and aftercare.
- Results are more gradual but can still be impressive.
If you want fast, dramatic results, you should go professional. However, if you want consistency, convenience, and savings, at-home might be for you.
Targeted Areas for Microneedling
Microneedling is versatile and can be used on various parts of the body:
- Face: The most common area, targeting wrinkles, acne scars, pigmentation, and large pores.
- Neck and Décolletage: Helps tighten and rejuvenate thinner, ageing skin.
- Hands: Improves texture and reduces sun damage.
- Scalp: Stimulates hair follicles to encourage hair regrowth.
- Stretch Marks: Often used on thighs, hips, abdomen, or arms to reduce stretch marks.
Risks and Side Effects
Although microneedling is generally safe, especially when performed by a trained professional, it does carry some risks:
- Redness and Irritation: Common and temporary, usually subsiding within 24–48 hours.
- Swelling: Mild swelling may occur, particularly after deeper treatments.
- Pinpoint Bleeding: Especially with longer needles, small spots of bleeding can appear.
- Dryness and Peeling: As the skin heals, some flaking may happen.
- Hyperpigmentation: If done improperly or without sun protection, it can cause dark spots.
- Infection: Using non-sterile tools or poor aftercare can lead to infection.
People with active acne, eczema, rosacea, or bleeding disorders should avoid microneedling unless cleared by a dermatologist.
How to Prepare for Microneedling
Preparation makes all the difference in results and safety.
1 week before:
- Stop retinoids, AHAs/BHAs, and strong vitamin C serums.
- Avoid waxing or chemical peels.
1–2 days before:
- Minimise sun exposure.
- Stay hydrated and moisturised.
On the day:
- Start with a clean, makeup-free face.
- Disinfect your microneedling cartridges.
- Have a soothing serum (like hyaluronic acid) ready to apply.
What the Procedure Feels Like
Professional microneedling usually involves numbing cream, so you mostly feel a vibrating pressure. At home, especially with shallower depths, the sensation is like light scratching or sandpaper.
It’s not exactly relaxing, but most people describe it as tolerable. Areas with less fat (like the forehead) can feel sharper.
Recovery Roadmap: A Skincare Diary
Here’s what you can expect after microneedling at home:
- Day 1: Skin is red, warm, and feels tight, almost like a sunburn.
- Day 2–3: Redness fades; skin may look slightly pink.
- Day 3–5: Flaking or dryness possible.
- Day 7: Most irritation is gone, and skin looks brighter.
- Week 2–4: Collagen production kicks in, giving that “glow from within.”
Can I combine it with actives like retinol?
Not immediately after, wait at least 5–7 days.
How many sessions until results?
Noticeable changes often appear after 3–6 sessions, spaced 4–6 weeks apart.
Is microneedling painful?
With numbing cream, it’s well tolerated. At-home shallow treatments are mildly uncomfortable at most.
Can darker skin types do microneedling?
Yes, but they are more prone to PIH (post-inflammatory hyperpigmentation). Proper aftercare is crucial.
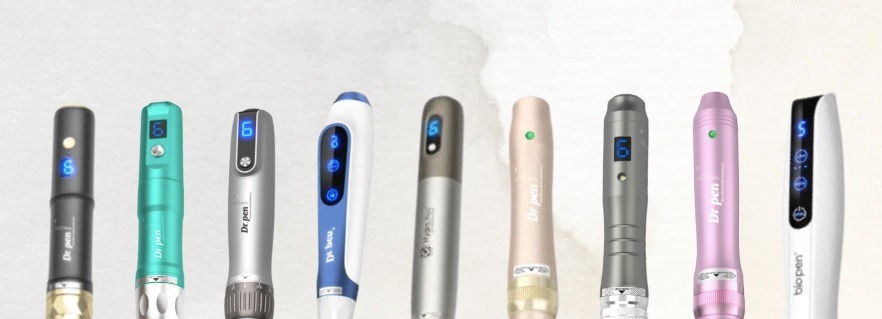
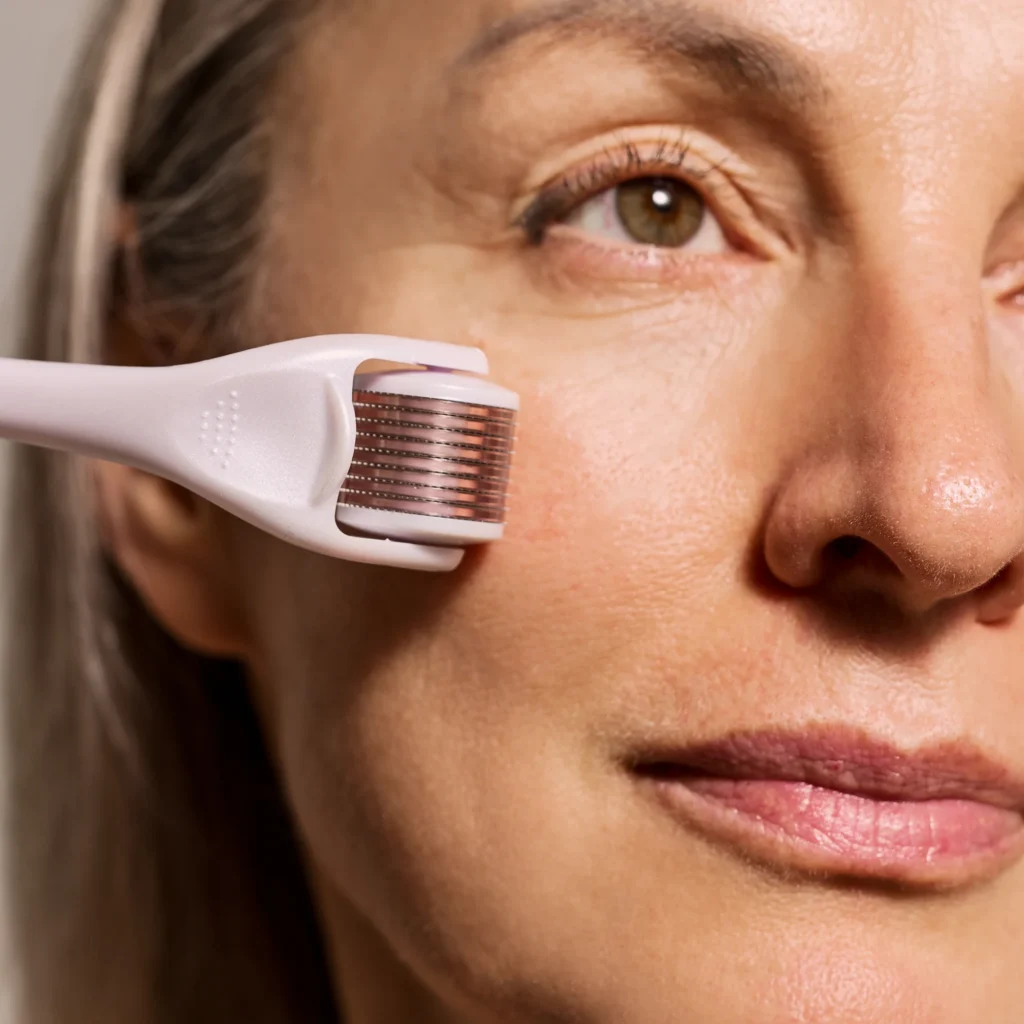
At-Home Tools: Rollers vs Pens
If you’ve seen dermarollers online, you might be wondering why people now prefer pens like the Dr. Pen M8.
Dermarollers:
- Simple, inexpensive.
- Fixed needle length.
- Rolling motion can cause micro-tears in the skin.
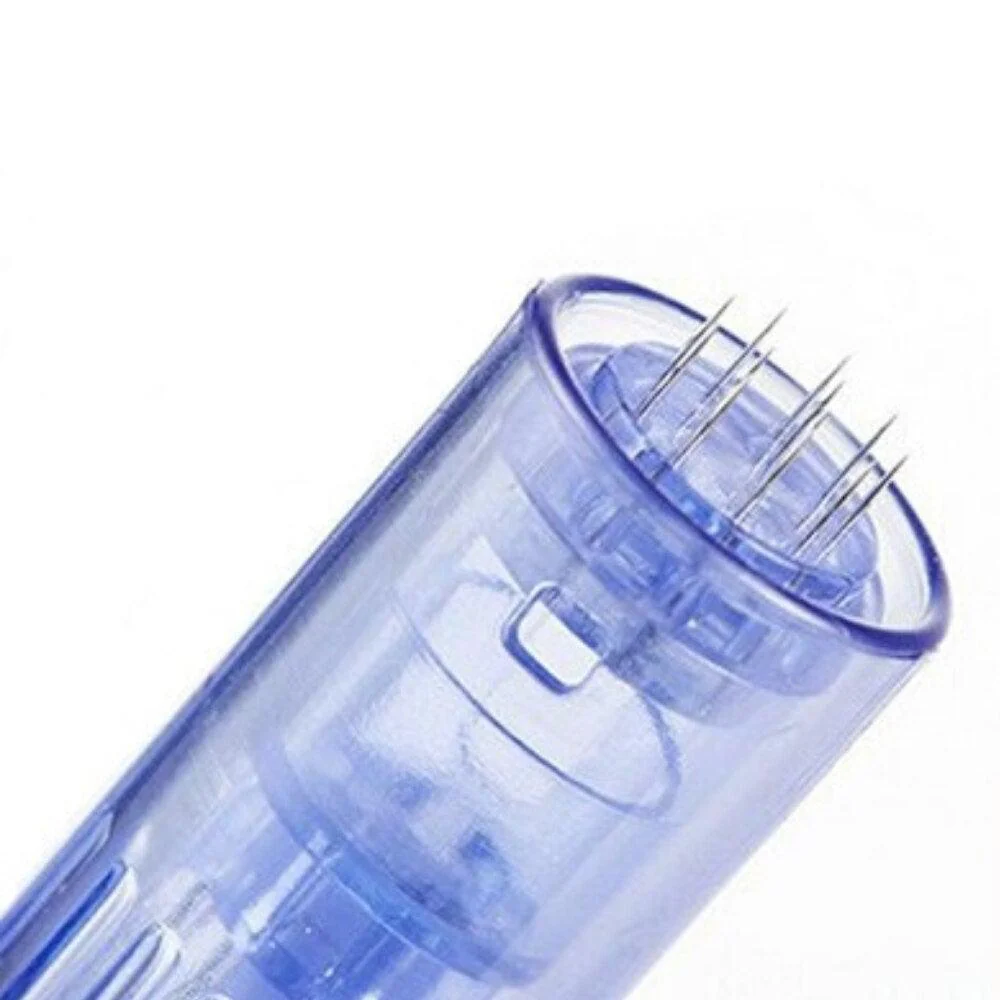
Dermapens:
- Adjustable depth.
- Vertical stamping (less trauma, more precision).
- Safer for delicate areas like under the eyes.
- Professional-style results at home.
Verdict: Dermapens are safer, more effective, and better long-term investments.
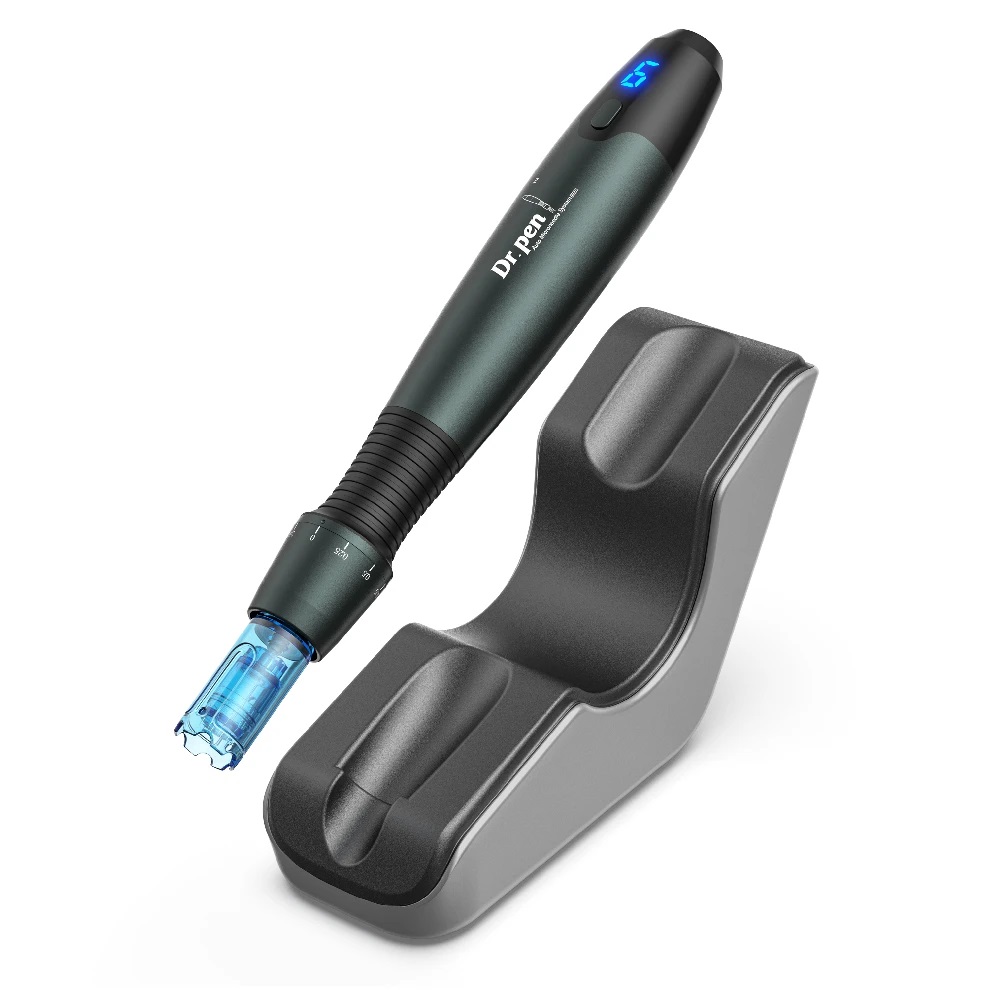
Introducing My Dr. Pen M8
Now for the fun part, my device! The Dr. Pen M8 is one of the most advanced at-home microneedling pens currently available.
Why I chose it:
- Adjustable needle depth (0.25 mm to 2.5 mm).
- 6 speed settings.
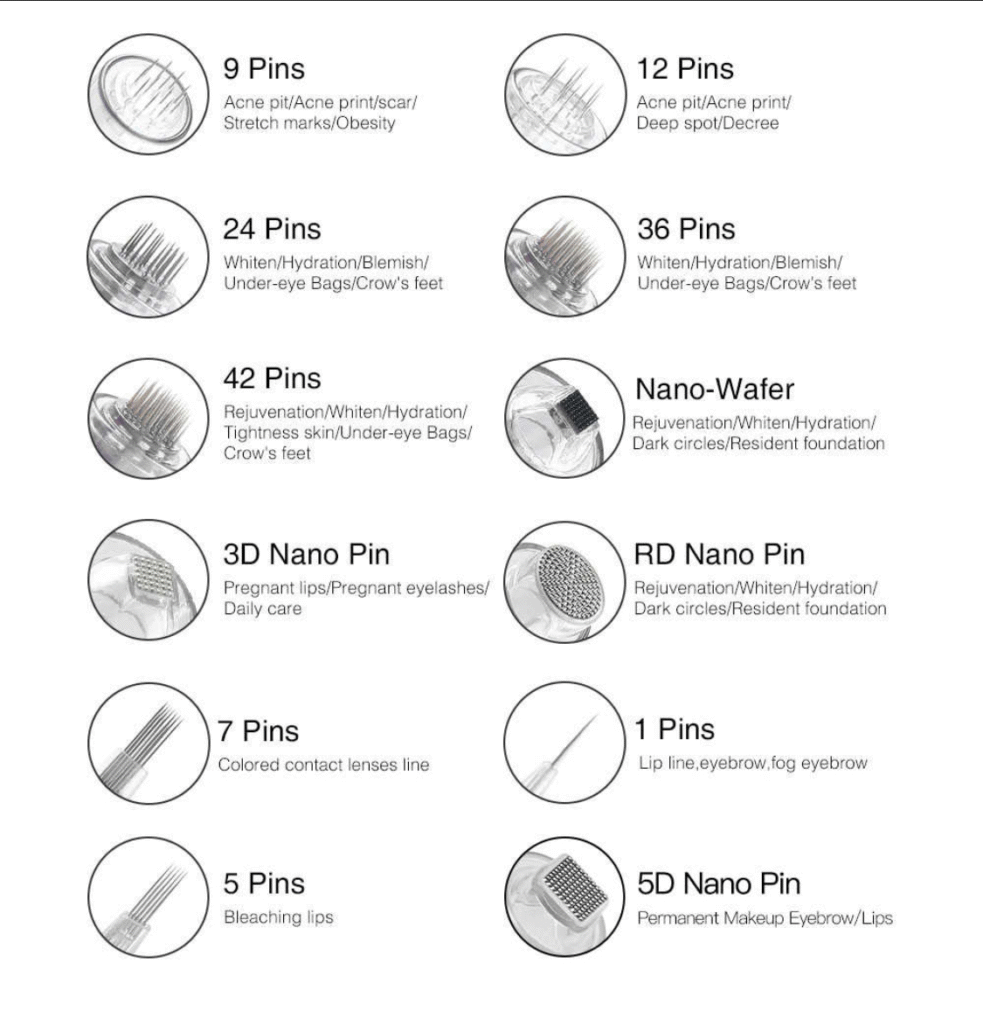
- Compatible with 12- and 16-pin cartridges.
- Cordless rechargeable design.
Compared to rollers, this pen allows me to target different skin concerns with precision. For example, I might use a shallower setting (0.25 mm) for serum absorption and a deeper setting (1–1.5 mm) for areas with acne scars.
I’ll be documenting my journey with the Dr. Pen M8 over the coming weeks, sharing before-and-after photos, what the process feels like, and how my skin responds.
Tips for the Best Results
- Always disinfect cartridges before and after use.
- Apply a hydrating serum immediately after treatment.
- Use SPF daily; your skin will be extra sensitive to UV.
- Stick to gentle, nourishing products post-treatment.
- Consistency is key; space sessions 4–6 weeks apart.
Conclusion
Microneedling is one of the most exciting treatments you can do at home to improve skin health and appearance. While professional sessions deliver dramatic results, devices like the Dr. Pen M8 make it possible to bring collagen induction therapy into your own skincare routine safely and effectively.
I’ll be using my Dr. Pen M8 over the coming weeks and sharing updates on how my skin responds, the glow, the texture changes, and maybe even some challenges along the way. If you’ve been curious about microneedling but hesitant to start, stick around. I’ll take you along for the full journey.

Bear in mind that some of the links in this post are affiliate links and if you go through them to make a purchase I will earn a commission. Keep in mind that I link these companies and their products because of their quality and not because of the commission I receive from your purchases. The decision is yours, and whether or not you decide to buy something is completely up to you.